
Table of Contents
- Step 1: Prep Your Boots and Feet Before You Start
- Step 2: Wear Thick Wool Socks and Walk Around the House
- Step 3: Condition the Leather to Soften Stiff Spots
- Step 4: Use the Best Tools for Stretching Leather Boots
- Step 5: Lacing Techniques That Reduce Pressure Points
- How Long to Break In Leather Boots (and When to Be Patient)
- Common Mistakes to Avoid When Breaking In Stiff Leather Boots
- Post-Break-In Care: Keeping Leather Soft and Durable
- Frequently Asked Questions
Last Updated: September 28, 2026
Step 1: Prep Your Boots and Feet Before You Start
Learning how to break in stiff leather boots starts with preparation, not force. Rushing the first day is the fastest way to end up with blisters and a pair of boots you resent.
Here's what most people get wrong: they treat break-in like a battle. It isn't. Leather is skin, and it responds to gentle, repeated pressure over time.
What You'll Need
- Thick wool socks (merino or similar)
- Leather conditioner or boot oil
- A boot stretcher or shoe trees
- A soft cloth or brush
- Bandages or moleskin for hot spots
Set aside 15 minutes for prep. Wipe off any dust first. Then check the inside seams with your fingers for rough spots that could rub.
Step 2: Wear Thick Wool Socks and Walk Around the House
Start with short indoor sessions. Thick wool socks cushion your heel and reduce friction, which is where most break-in pain starts.
Lace up and wear them for 20 to 30 minutes at a time. Do this two or three times a day for the first week.
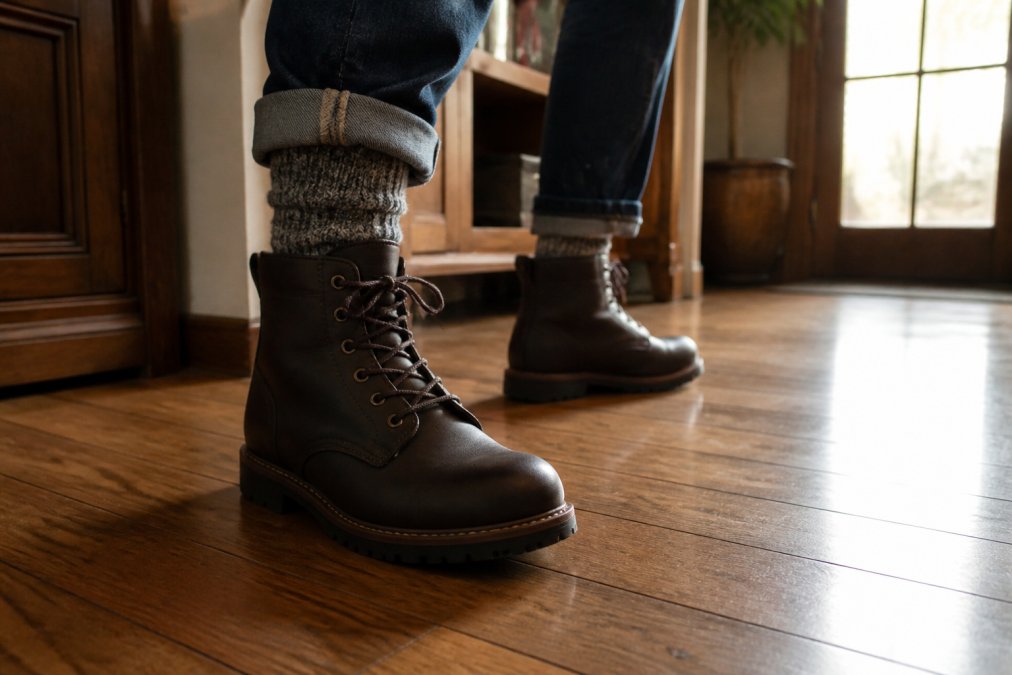
The house is the right place because you can stop the moment something hurts. Walking outside on day one is how you get blisters you'll feel for a week.
Pay attention to pressure points. If your heel lifts more than a little, the fit may be off, not just stiff.
Step 3: Condition the Leather to Soften Stiff Spots
A good leather boot conditioner for softening is your best friend here. It adds oils back into the leather so it flexes instead of fighting you.
Apply a small amount with a cloth. Work it into the stiff zones: the flex point across the top, the heel counter, and any crease lines.
Let it sit for a few hours or overnight. Wipe off the excess before you wear them.
A note on materials: Full-grain and oil-tanned leather drink up conditioner and soften well. Corrected-grain or heavily finished leather absorbs less, so use it sparingly.
Step 4: Use the Best Tools for Stretching Leather Boots
The best tools for stretching leather boots are a boot stretcher and cedar shoe trees. Both work while you're not wearing them, which is the point.
A boot stretcher pushes specific spots wider, useful for a tight toe box or a pinching instep. Shoe trees hold the shape and pull moisture out after each wear.
- Boot stretcher: targets width and specific pressure points
- Cedar shoe trees: absorb moisture, keep shape, reduce odor
- Boot oil or conditioner: softens the upper over time
Use the stretcher in short sessions. Crank it a little, wait a day, then adjust again. Slow and steady beats one big stretch.
Step 5: Lacing Techniques That Reduce Pressure Points
Lacing is the most overlooked fix, and it is the one adjustment you can make in thirty seconds without touching the leather. The right pattern spreads tension away from hot spots instead of concentrating it over one spot on your foot. Most break-in pain is not the boot being too small; it is lace tension loading a single area.
Here is how to diagnose and fix the three most common pressure problems.
Instep pressure (pain across the top of your foot). The eyelet pair sitting directly over the sore spot is pulling the tongue down onto your instep. Skip that pair entirely. Run the laces straight up the sides past it, then resume crossing above. This is sometimes called window lacing because it leaves an open gap over the pressure point. You keep a snug fit everywhere else while the instep gets relief.
Heel slip (your heel lifts and rubs the heel counter). This is the blister maker. Use a heel-lock pattern at the top two eyelets: lace normally up to the second-to-last eyelet, then run each lace end straight up into the top eyelet on the same side, leaving a small loop. Cross the ends over and pass each one through the opposite loop before tying. That last step pulls your heel down and back into the heel counter, so the boot moves with your foot instead of against it.
Wide forefoot or pinching toe box. Use gap lacing: skip the eyelet pairs over the widest part of your foot and lace straight across above and below them. This opens the volume over the forefoot without loosening the ankle, which is where you actually want the boot locked in.
A few practical notes that matter during break-in:
- Lace from the bottom up, and snug each section as you go rather than yanking the whole thing tight at the top.
- Use flat, low-stretch laces for heel lock; round or stretchy laces slip and the lock will not hold.
- Re-tie mid-day. A boot that feels right in the morning can feel tight by afternoon as your feet swell, and a quick re-lace beats gritting through it.
- If a pressure point persists after two weeks of correct lacing, the problem is fit or the leather, not the laces. Stop and reassess rather than pushing through pain.
How Long to Break In Leather Boots (and When to Be Patient)
Expect two to four weeks of regular wear for most leather boots. Stiffer boots, like heavy work boots, can take longer.
The break-in period isn't a flaw. It's the leather molding to your foot's shape, which is what makes a good pair feel custom over time.
Signs you're on track:
- The leather creases at the flex point
- Pressure points fade after each wear
- Your foot sits deeper in the footbed
Signs you're pushing too hard:
- Sharp pain that doesn't ease
- Red, hot spots that form fast
- Numbness in your toes
Common Mistakes to Avoid When Breaking In Stiff Leather Boots
The biggest mistake is treating break-in as a one-day project. It isn't, and the shortcuts people use cause the most damage.
Here's what to skip:
- Heat methods: ovens, hot water, hair dryers. All cause heat damage and cracking.
- Wearing them all day on day one: this is how you get blisters and give up.
- Skipping conditioner: dry leather cracks instead of softening.
- Ignoring fit problems: if the size is wrong, no amount of break-in fixes it.
- Over-stretching: cranking a stretcher too far can warp the boot.
A common mistake is blaming the boot when the fit is the real issue. If your toes jam or your heel slides badly, get the size checked before you invest weeks in break-in.
Post-Break-In Care: Keeping Leather Soft and Durable
Break-in is not the finish line; it is the moment your boots start depending on you. The creases you just set at the flex point are now the spots that will crack first if the leather dries out, because flexing concentrates stress exactly where the grain has been worked. Post-break-in care is really about protecting those creases.
Condition on a schedule tied to wear, not the calendar. Every few months is fine for occasional wear. Daily wear means every four to six weeks, and sooner if the leather looks dry or feels stiff again. The tell is the flex point: if it looks pale or shows fine surface lines, it needs oil before those lines become cracks.
Match the product to the leather. Full-grain and oil-tanned leather absorb conditioner readily and can take a richer product. Corrected-grain and heavily finished leather sit under a surface coating, so they take very little; over-applying leaves a greasy film that attracts dirt.
Frequently Asked Questions
How do you soften stiff leather boots?
Apply a leather conditioner made for full-grain or oil-tanned leather, then wear the boots with thick wool socks for short sessions. A boot stretcher can target specific pressure points. Avoid heat, which damages the leather's grain. With consistent, controlled use, the leather molds to your foot's anatomical shape.
What does WD-40 do to leather boots?
WD-40 is a petroleum-based solvent, not a leather conditioner. It can dry out the leather, break down stitching, and leave a greasy residue that attracts dirt. It may temporarily soften the surface, but it damages the leather's structure over time. Use a proper leather boot conditioner instead.
How long does it take to soften leather boots?
Most stiff leather boots need 1 to 3 weeks of regular wear to break in. Full-grain and oil-tanned leather may take longer, while softer leathers break in faster. Wear them a few hours a day, gradually increasing time. If pain persists after 3 weeks, check your fit or try a boot stretcher.
Should you wear thick socks to break in boots?
Yes. Thick wool socks add cushioning and fill extra space, helping the leather stretch where you need it. They also reduce friction that causes blisters. Wear them during the first week of break-in, then switch to your normal socks once the boots start molding to your feet.
Breaking in stiff leather boots takes time, but the payoff is a pair that fits like it was made for you. If you'd rather start with boots that break in easier and gear that holds up, Lazy B Western Wear & Tack carries durable western footwear and trusted tack brands for the arena and the ranch. Check out our selection and gear up with quality that lasts.